widget=clock on "How to install Hubzilla in seven easy steps" guide

last edited: Mon, 09 Apr 2018 05:51:31 +0200
@h.ear.t | tobias
I get here https://hubzilla.rocks/page/tobias/tutorial_install_hubzilla_in_7_easy_steps ?
?
 .
.
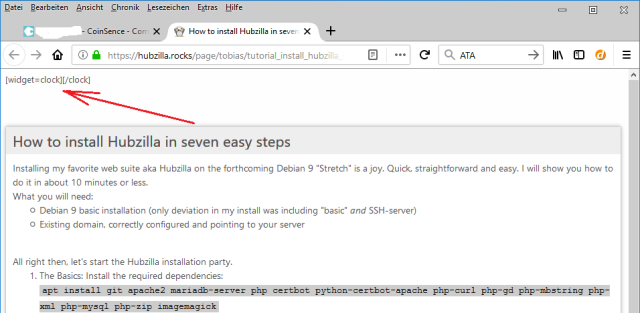
I get here https://hubzilla.rocks/page/tobias/tutorial_install_hubzilla_in_7_easy_steps
[widget=clock][/clock] . S. Screenshot. I reckon, that isn't so your purpose ? .
 Alex
Alex neue medienordnung plus
I meant that the process really works, as I could not test my correction. Will now. Plus move this one from a static page to an article. I think that makes sense, after all we've got that now and @Andrew Manning wrote such a nice overview even I now ... got "it".
OK, I have now finished testing.
Please note: This howto was moved to an article. I added a note at the old location linking to the new one, but that might disappear over time.
If you find any errors or inconsistencies, please report a bug to me.
 h.ear.t | tobias wrote the following post Mon, 09 Apr 2018 19:02:19 +0200
Please note: This howto was moved to an article. I added a note at the old location linking to the new one, but that might disappear over time.
If you find any errors or inconsistencies, please report a bug to me.
How to install Hubzilla in 7 easy steps on Debian 9 Squeeze
[summary]
Installing my favorite web suite aka Hubzilla on Debian 9 "Stretch" is a joy. Quick, straightforward and easy. I will show you how to do it in about 10 minutes or less.
Edit 09.04.2018:
Unfortunately certbot has seen some changes and will only work once installed from Debian backports. The package included in Stretch will no longer fetch you any certs. This tutorial has been updated to reflect this.
[/summary]
What you will need:
All right then, let's start the Hubzilla installation party.
[summary]
Installing my favorite web suite aka Hubzilla on Debian 9 "Stretch" is a joy. Quick, straightforward and easy. I will show you how to do it in about 10 minutes or less.
Edit 09.04.2018:
Unfortunately certbot has seen some changes and will only work once installed from Debian backports. The package included in Stretch will no longer fetch you any certs. This tutorial has been updated to reflect this.
[/summary]
What you will need:
- Debian 9 basic installation (only deviation in my install was including "basic" and SSH-server, which actually makes sense as you need a way to remote control your system)
- Existing domain, correctly configured and pointing to your server
All right then, let's start the Hubzilla installation party.
- The Basics: Install the required dependencies:
apt install git apache2 mariadb-server php php-curl php-gd php-mbstring php-xml php-mysql php-zip imagemagick
In order to install the new working certbot version from Debian Strech-Backports, we need to add that mirror to apt and enable pinning to make sure apt will not confuse these packages with the old ones from the main release pool.
echo "deb http://ftp.debian.org/debian stretch-backports main" >> /etc/apt/sources.list.d/backports.list
cat > /etc/apt/preferences.d/stretch<< EOF
Package: *
Pin: release a=stable, v=8
Pin-Priority: 900
EOF

cat > /etc/apt/preferences.d/stretch-backports<< EOF
Package: *
Pin: release n=stretch-backports
Pin-Priority: -10
EOF

cat > /etc/apt/preferences.d/stretch-backports-certbot<< EOF
Package: certbot python-certbot python-certbot-apache python-acme
Pin: release n=stretch-backports
Pin-Priority: 100
EOF
Then we can use backports for the certbot installation.apt update; apt install certbot python-certbot-apache -t stretch-backports - Webserver apache: Create vhost file /etc/apache2/sites-available/hubzilla.conf and enable vhost, enable the required apache module rewrite. You need to replace example.com with your own domain name.
MyDomain=example.com
Then paste this into your shell.
cat > /etc/apache2/sites-available/hubzilla.conf << EOF
<VirtualHost *:80>
    ServerAdmin webmaster@localhost
    ServerName $MyDomain
    DocumentRoot /var/www/hubzilla
    <Directory />
        Options FollowSymLinks
        AllowOverride All
    </Directory>
    <Directory /var/www/>
        Options Indexes FollowSymLinks
        AllowOverride All
        Order allow,deny
        allow from all
    </Directory>
    ErrorLog ${APACHE_LOG_DIR}/hubzilla_error.log
    LogLevel warn
    CustomLog ${APACHE_LOG_DIR}/hubzilla_access.log combined
</VirtualHost>
EOF
Enable the new vhosta2ensite hubzilla
You might want to disable the default site (enabled automatically upon installation):a2dissite 000-default.conf
Enable apache modules rewritea2enmod rewrite
Restart apache2 in order to activate all these changessystemctl restart apache2 - Download Hubzilla: clone the Hubzilla Git repository and chown everything to be writable to the webserver account www-data
cd /var/www/ ; git clone https://github.com/redmatrix/hubzilla ; chown -R www-data. hubzilla; - To create the database set your desired password first:
MyPassword=SuperSecret
Then actually create the database:mysql -u root -e "create database hubzilla ; CREATE USER 'hubzilla'@'localhost' IDENTIFIED BY '$MyPassword'; GRANT ALL PRIVILEGES ON hubzilla.* to 'hubzilla'@'localhost';" - SSL Encryption: create the letscencrypt certificates in order to use SSL and have certbot automatically configure your apache vhost to use SSL. Just follow the instructions. Let certbot configure your vhost to use SSL.
certbot - setup a cronjob
echo "*/10 * * * * cd /var/www/hubzilla; /usr/bin/php Zotlabs/Daemon/Master.php Cron" >> /etc/crontab - Finally: open your browser and follow the instructions.
https://my-hubzilla.site